As you all know, Spring Boot is a toolkit that makes it super easy to quickly develop powerful web services. It is very modular and made to play well with other frameworks and tools. In this tutorial I am going to show you how easy it is to set up a RESTful API towards an existing SQL database by using Speedment as the ORM.

Background
Speedment is an open-source toolkit that connects to a database, analyzes the metadata and uses it to generate entity- and managers classes to model the database in an object-oriented fashion. It also contains a runtime library that turns Java 8 Streams into optimized SQL queries, allowing you to write your code in a very type-safe and modern way. As it turns out, this is perfect for a Spring Application.
Goal of This Tutorial
The goal of this tutorial is to develop a REST API with Spring that grants access to different endpoints depending on the role of the user. If you want to look ahead, you can find all the sources from the guide here.
POST /account |
Accessible by anyone |
GET /account/{id} |
Accessible by admins, as well as the user in question |
GET /account |
Lists all accounts and is only accessible by admins |
Authentication will be made using a MySQL database that we will query using standard Java 8 Streams. In the end, we will have a fully object-oriented solution ready to be expanded with custom business logic!
If you would like to follow along with the finished project, you can clone it at GitHub.
Step 1: The Database
For the sake of simplicity, I am using a custom MySQL database that I created using the following statement. The idea is however that you can use any existing database that you happen to have access to.
create database `securerest`;
use `securerest`;

create table `account` (
    `id` bigint not null auto_increment primary key,
    `username` varchar(30) not null unique,
    `password` char(60) not null,
    `role` enum('USER', 'ADMIN') not null
);
Step 2: Create the Maven Project
To quickly get up a new Spring Project, I recommend the awesome Spring Initializr website. There you can easily enter the dependencies you need for your project.
We need the following Spring dependencies:
- spring-boot-starter-security
- spring-boot-starter-web
- mysql-connector-java
Secondly, we also need to add the Speedment dependency as well as the Speedment plugin to generate our code.
<dependency>
    <groupId>com.speedment</groupId>
    <artifactId>runtime</artifactId>
    <version>${speedment.version}</version>
    <type>pom</type>
</dependency>
...
<plugin>
    <groupId>com.speedment</groupId>
    <artifactId>speedment-maven-plugin</artifactId>
    <version>${speedment.version}</version>

    <dependencies>
        <dependency>
            <groupId>mysql</groupId>
            <artifactId>mysql-connector-java</artifactId>
            <version>${mysql.version}</version>
            <scope>runtime</scope>
        </dependency>
    </dependencies>
</plugin>
Step 3: Generate Domain Model
With the plugin added, we can run the following Maven Goal to launch the Speedment UI.
mvn speedment:tool

This will open up the Speedment Tool. It will ask you for the username, password, schema name, etc. for your database. Enter values for the fields and press “Connect”.
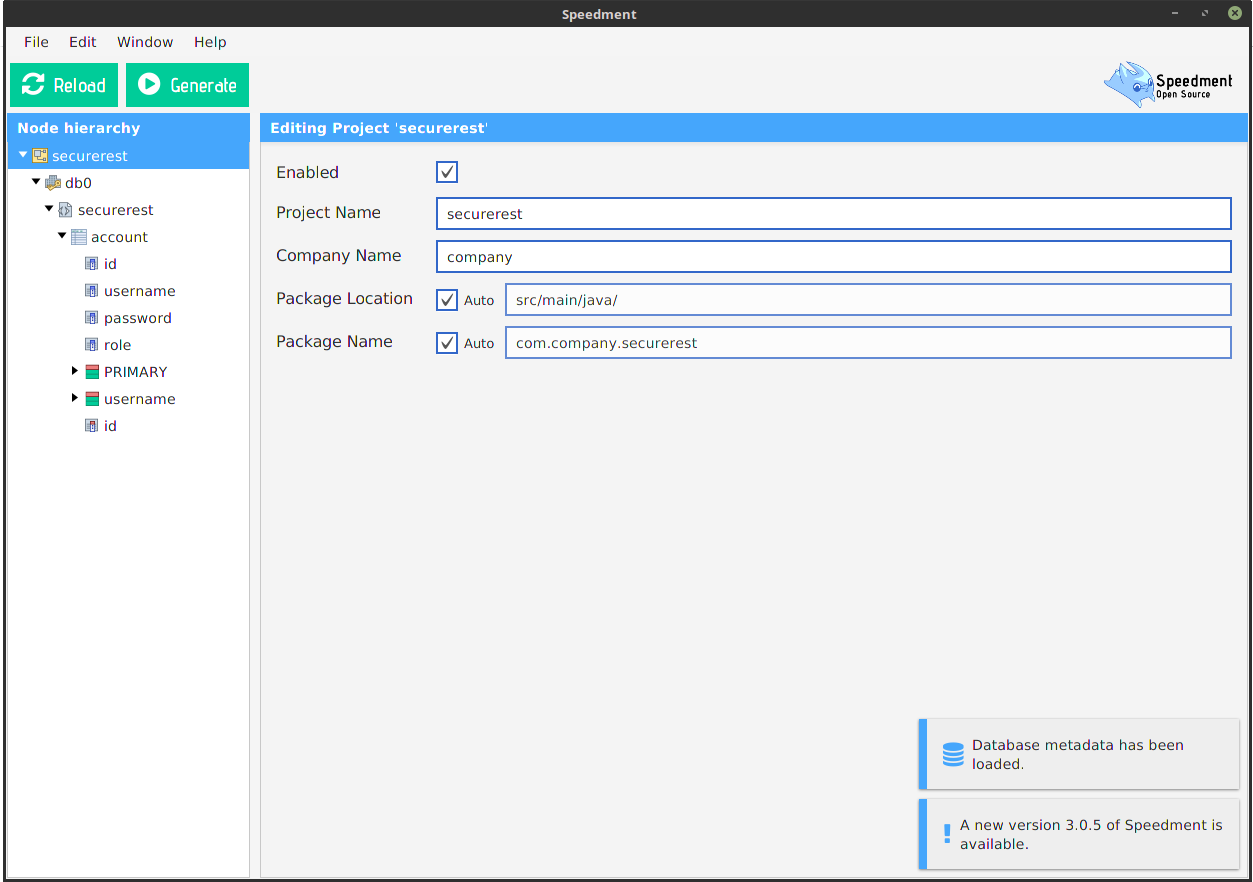
Inside the UI there are many configurations you can do. You can specify the exact location of the generated code, disable tables or columns that are irrelevant for the application and create aliases if you want a field or table to appear as something else in the code.
For this tutorial, it is enough to press “Generate”. You should now see how a number of new java classes and packages are generated into your project!
Step 4: Configure Spring Security
To allow Spring to launch Speedment as a Spring Bean, we need to specify how the instance is created. To do this, we create a class named SpeedmentConfiguration.
SpeedmentConfiguration.java
@Configuration
public class SpeedmentConfiguration {

    private @Value("${dbms.host}") String host;
    private @Value("${dbms.port}") int port;
    private @Value("${dbms.schema}") String schema;
    private @Value("${dbms.username}") String username;
    private @Value("${dbms.password}") String password;

    @Bean
    public SpeedmentApplication getSpeedmentApplication() {
        return new SpeedmentApplicationBuilder()
            .withIpAddress(host)
            .withPort(port)
            .withUsername(username)
            .withPassword(password)
            .withSchema(schema)
            .build();
    }

    @Bean
    public AccountManager getAccountManager(SpeedmentApplication app) {
        return app.getOrThrow(AccountManager.class);
    }
}
The @Value fields in the top are loaded by default from a file called application.properties. We should therefore specify the values there:
application.properties
# Speedment Settings
dbms.host=localhost
dbms.port=3306
dbms.schema=securerest
dbms.username=root
dbms.password=password

# Server Settings
server.port=9777
Next, we need to create a configuration class for the authentication of users. We call this class AuthenticationConfiguration.
AuthenticationConfiguration.java
@Configuration
public class AuthenticationConfiguration
extends GlobalAuthenticationConfigurerAdapter {

    private @Autowired AccountManager accounts;

    @Bean
    public DaoAuthenticationProvider authProvider() {
        final DaoAuthenticationProvider authProvider =
            new DaoAuthenticationProvider();

        authProvider.setUserDetailsService(getUserDetailsService());
        authProvider.setPasswordEncoder(getPasswordEncoder());
        return authProvider;
    }

    @Bean
    public UserDetailsService getUserDetailsService() {
        return username -> accounts.stream()
            .filter(Account.USERNAME.equal(username))
            .findAny()
            .orElseThrow(() -> new UsernameNotFoundException(
                "Could not find the user '" + username + "'"
            ));
    }

    @Bean
    public PasswordEncoder getPasswordEncoder() {
        return new BCryptPasswordEncoder();
    }

    @Override
    public void init(
            AuthenticationManagerBuilder auth) throws Exception {
        auth.userDetailsService(getUserDetailsService())
            .passwordEncoder(getPasswordEncoder());
    }
}
Note how we can use @Autowired on the generated AccountManager since it is specified as a Spring Bean in the SpeedmentConfiguration class.
In the method getUserDetailsService(), we use the Stream API with a custom predicate, allowing the stream to be turned into an optimized SQL query. There is one thing we need to do to make this method work, however. We need to make sure the generated Account interface extends UserDetails so that it can be used seamlessly with the Spring API. This is easy to do, since Speedment doesn’t overwrite files that doesn’t begin with the prefix “Generated”.
Account.java
public interface Account extends GeneratedAccount, UserDetails {

}
We also need to add a few methods to the implementation class to support the interface.
AccountImpl.java
@JsonIgnoreProperties("password")
public final class AccountImpl extends GeneratedAccountImpl
implements Account {

    private static final long serialVersionUID = -7552975849070084309L;

    @Override @JsonIgnore
    public Collection<? extends GrantedAuthority> getAuthorities() {
        return createAuthorityList(getRole());
    }

    @Override @JsonIgnore
    public boolean isAccountNonExpired() {
        return true;
    }

    @Override @JsonIgnore
    public boolean isAccountNonLocked() {
        return true;
    }

    @Override @JsonIgnore
    public boolean isCredentialsNonExpired() {
        return true;
    }

    @Override @JsonIgnore
    public boolean isEnabled() {
        return true;
    }
}
We then create a third configuration file to define what authorities are required to access the various REST endpoints.
SecurityConfiguration.java
@Configuration
@EnableWebSecurity
public class SecurityConfiguration
extends WebSecurityConfigurerAdapter {

    @Override
    protected void configure(HttpSecurity http) throws Exception {
        http.authorizeRequests()
                .antMatchers(POST, "/account").permitAll()
                .antMatchers(GET, "/account").hasAuthority("ROLE_ADMIN")
                .anyRequest().fullyAuthenticated()
            .and().httpBasic()
            .and().csrf().disable();
    }
}
Step 5: Create the Controller
The final step is to create the Controller class where our business logic is located. The class is annotated with @RestController to allow Spring to pick it up automatically. It defines three mappings, one for each REST endpoint.
AccountController.java
@RestController
public class AccountController {

    private @Autowired AccountManager accounts;
    private @Autowired PasswordEncoder passwordEncoder;

    ...

}
The first endpoint is the registration command. It will be located on “POST /account”. We take two parameters, username and password, hash the password and then persist it to the database. The operation will fail if the username already exists since it is defined as UNIQUE in the database.
    @PostMapping("/account")
    long onPostAccount(
            @RequestParam("username") String username,
            @RequestParam("password") String password) {

        final Account created = accounts.persist(new AccountImpl()
            .setUsername(username)
            .setPassword(passwordEncoder.encode(password))
            .setRole("USER")
        );

        return created.getId();
    }
Next up is the “GET /account” endpoint. It is quite simple. We will initiate a stream using the generated manager class. The stream is then optimized into a SQL query by Speedment.
    @GetMapping("/account")
    List<Account> onGetAllAccounts() {
        return accounts.stream().collect(toList());
    }
The last endpoint is a bit more complicated. We have configured Spring to only allow logged in users to access “GET /account{id}”, but we want to make sure users can only access their own information unless they have the “ADMIN” role.
    @GetMapping("/account/{id}")
    Account onGetAccount(
            @PathVariable("id") long accountId,
            Authentication auth) {

        final Account account = (Account) auth.getPrincipal();

        if (account.getId() == accountId) {
            return account;
        } else if ("ADMIN".equals(account.getRole())) {
            return accounts.stream()
                .filter(Account.ID.equal(accountId))
                .findAny().orElseThrow(NotFoundException::new);
        } else {
            throw new ForbiddenException();
        }
    }
Done! We now have a REST API that uses a database to store users and Basic Authentication to make sure users can only invoke the commands they have access to!
Trying It Out
To try the REST API we just created, simply fire up a terminal and use the cURL command!
To register an account:
curl -X POST "http://localhost:9777/account
    ?username=my_user
    &password=my_pass"
To see our own information (in this case we are the user with ID 1):
curl -X GET -u my_user:my_pass "http://localhost:9777/account/1"
To list all users (requires ADMIN role):
curl -X GET -u my_user:my_pass "http://localhost:9777/account"
Summary
In this tutorial we have created a new Spring Boot project to quickly map up a RESTful API with a simple registration system and used Speedment to generate an object-oriented database access layer for this API. We have also configured Spring Security to require users to authenticate themselves to access particular endpoints.
For more guides and tutorials on how to use Speedment, check out the GitHub page! There you can also find some example projects on how to use more of the cool code-generation features available in Speedment!
The full sources for this tutorial can be found here!
Until next time!